I ran a little test just now for 2 Photoshop Sharpening Actions. I'm not sure you can see the distinctions here on the blog but I'll walk you thru them and you can decide for yourself what you want to do. If you're into Photoshop and photography at all. At least it's a break from from all the writing stuff which is getting pretty darn repetitive even for me.
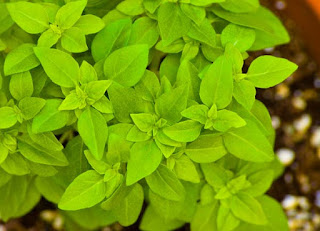
The first thing I did was take a close-up of a Pistou Basil, a mini French variety as opposed to the normal Greek mini basil you usually find, I started from seed and potted up this morning. It's cloudy out and I shot in RAW instead of JPG because I thought that would help me. If it did I couldn't tell that part. I wanted something with a lot of lines so the sharpness would be easy to detect.
I just took the 1 shot, because I didn't really care--that wasn't the point, the point was to see how much the software could do. I think I could have tinkered with the brightness a little but it's like 95 degrees here, 150% humidity, so I'm choosing not to care about a lot of stuff this afternoon.
Then I ran a High Pass Mask and I wasn't thrilled. If I had spent more time I might have been happier but I decided to skip all that and try the 2 actions I talked about yesterday. The trick with the High Pass is to go one click below the glow.
I installed the Sharpen Action. (Photoshop, contrary to how contrary it is about everything else, if you download an action and open it up in the download folder, Photoshop will go ahead on its own and install it for you. You don't have to do anything or "install" it. Very nice. You won't find that in their instructions anywhere if you can find their instructions. Still, thank you.)
Here is the same image using what was called Sharpen Action.
You can see it's an improvement. Sharpening only sharpens. It doesn't mess with color tone or light.
Then I went back to the untreated image and ran Manyk's sharpening action.
I think that's better. You need to look at the smallest leaves in the center of the cluster and decide if that's sharper than the image above or not. At some point it becomes arbitrary and also a function of your own eyesight. It also depends on what you're going to use it for.
Also know that while I shot this image as a huge file, I didn't save it for upload as huge. Because I actually didn't want it that great and possibly be seen elsewhere. Altho there's nothing preventing that and I didn't watermark it. I just want to have a discussion about sharpness. I should have taken a picture of the milk bottle I was using earlier in the week. That was great because of all the lettering. Very easy to see the sharpness.
So that's Photoshop Sharpening Actions. Here's the address for you to download Manyk's file. It's free out of the kindness of his heart.
http://www.kevinthom.com/Manyk_SRS_PSAction.zip


No comments:
Post a Comment